How To Get Started With Property Photography
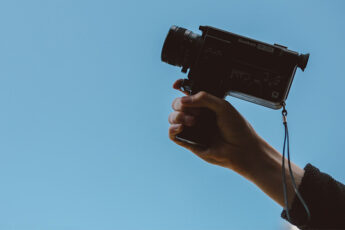
So why do we need Property Photography? The main purpose of property photography is to sell or rent a property or space. It usually involves taking pictures of both the interior and exteriors of the property. It requires some level of skills in architectural and interior photography which can be learnt with practice. Photos need to show space, features, lighting, room layouts and they need to look a certain way. In particular you will need a range of both wide angle and detailed shots of the property. We’ll talk more about how to get those shots later in the article.
WHAT YOU’LL NEED TO SHOOT PROPERTY PHOTOGRAPHY
You’ve decided that you’d like to get started with Property Photography so what are the minimum requirements to get going?
Fundamentally, you’re going to require:
- Photography Equipment
- A Client
- A Computer to edit the photos
- A way to deliver the photos
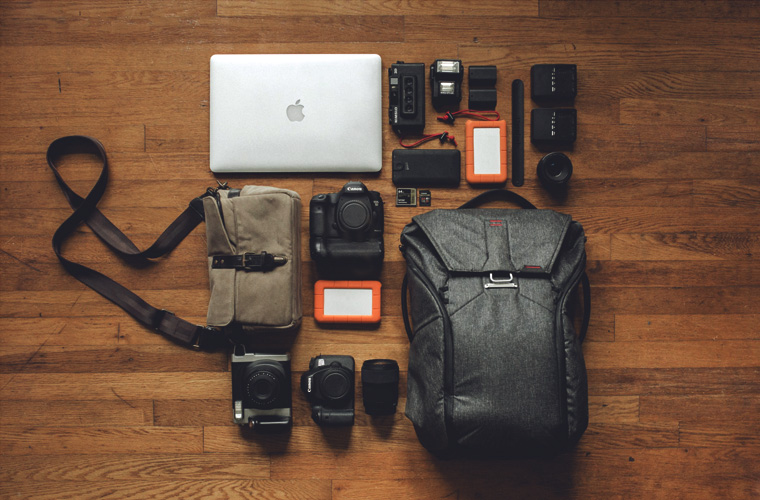
EQUIPMENT

At the very least you’re going to require:
- Camera – By far the most essential piece of equipment is the camera. Ideally this will be a full frame body although in some circumstances you may be able to get away with an APS-C sensor size. You can read more about whether you need a full-frame camera Here:
- Lens – The most essential lens will be a wide angle lens. This will be capable of capturing the entire space in order to show off the size of the room. This should be somewhere in the region of a 14-16mm lens on a full frame camera. It will also be beneficial to have a lens to capture details; somewhere in the range of 50-80mm. You can find more details on lens choice here: [LINK]
- Tripod – You’re going to need a sturdy tripod that will stay in place when you’re taking the shot. On the other hand, it needs to be light enough to move around room after room. Finding a balance between light-eight and sturdy will be important; we use the K&F Concept Aluminium Tripod
Click HERE to see whats in my Property Photography Kit:
Read our follow up article if you need a little more detail on what you’ll need as a property photographer.
YOUR CLIENT
Your bag is packed with all of your gear and you’re ready to shoot so what next? Well, you’re going to need a client with a property. Broadly speaking, your client will come from one of the following groups:
- An Estate Agent – These guys have a lot of property to shoot so it’s often a great place to start. Wherever you live, the chances are there is at least one estate agent in your area. Go and talk directly to them and ask if they need another photographer. If you’re new it may be OK to offer to shoot at least 1 property for free if you really need the practice and can’t promise professional results just yet. The key here is to make sure you are not being taken advantage of. Be very clear that it’s 1 free shoot and no more.
- A Private seller/landlord – Although harder to come by if you’re not well known, there are plenty of people who won’t want to use an estate agent to sell/rent their property. Where an estate agent may have regular work, people who fall into this group will often only have 1 or a handful of properties so you’ll have to be constantly on the lookout for future work.
- Property Developers – Often a property developer will want to have photos taken for the purpose of showcasing their portfolio. Developers often have a range of projects on the go at any one time, so you may find you are able to get repeat work if you find the right developer.
- A Photography Agency – Finding clients can take up a lot of time and energy, so an alternative is to find an agency that uses freelance photographers. The upside is that you could get a nice steady flow of work but the downside is that they often pay very poorly for the amount of time and effort you put in. If you’re starting out though, it’s a great way to build a portfolio of work which will make it easier for you to source your own work in the future.
Whatever market you decide to pursue, acquiring clients is challenging and will require an ongoing effort and commitment. We will go into more detail about How To Get Your First Client in another article.
COMPUTER
Once you’ve taken your images of the property, you’re going to have to perform some basic editing to get a professional result. To do this, you’re going to need a computer and some software; the computer doesn’t need to be the most powerful machine, but don’t go for anything at the bottom end as it’ll slow you down and add time to your workflow. You’re also going to require software to edit your images; one of the industry standards is Adobe Lightroom which is part of the Adobe Creative Cloud. The Adobe Creative Cloud isn’t cheap coming in at around £50 per month if you want the full bundle. If you’re just starting out and only require Lightroom and Photoshop, there is a Photography Package which starts at £9.98/mo so ensure that you allow for that cost in your plans.
PHOTO DELIVERY

Once you’ve polished your final images and selected the ones that you’re going to send to the client, you now have to decide on how to send them.
- Email – The most simple way to send your images would be to zip them up and send them in an email. This method won’t require any additional software or subscriptions so it’s a great way to start, but some email clients limit how much you can send at any one time so you may get stuck if your files are large.
- File Transfer – You could use a File Transfer client online such as WeTransfer and these services will typically allow you to send up to 2GB of data per transaction. It’s a simple way to send files and you’ll get a confirmation when the client has downloaded the files.
- Google Drive – This method combines online storage with the ability to share files and folders with your clients. It’s a great way to ensure you have a backup of your files in the cloud as well as being able to allow or restrict access to certain folders very easily. As well as Google Drive, there are other services such as One Drive from Microsoft that perform in a similar way. Most of these services offer a free tier, but you’ll have to pay if you want more storage than the basic amount.
- Online Gallery – There are many specialist online galleries where you can display your photos and share with your clients. They offer a more high end feel and are a great way to show off your work. Prices vary between services but you’ll get additional features such as mobile galleries and various templates and themes to customise the look of the gallery. Pixieset is a great online gallery which you can find out more about here:
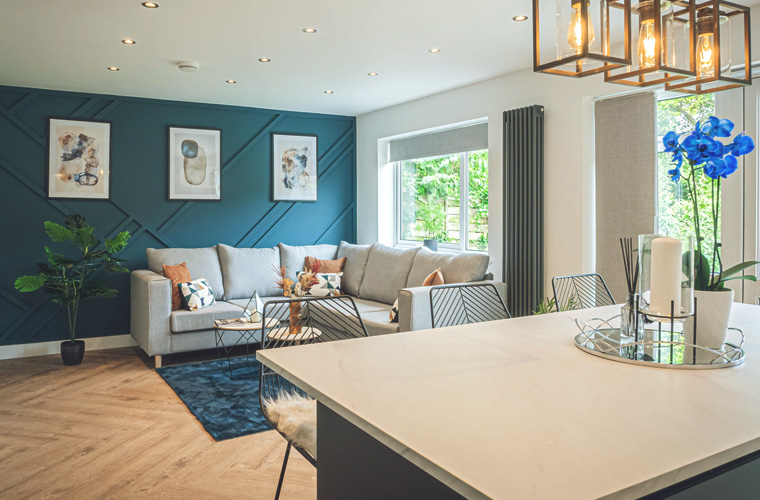
WHAT DOES PROPERTY PHOTOGRAPHY INVOLVE?
It might seem simple at first; go and take a few pictures of houses and rooms and get paid right? Well, there’s a little more that goes into shooting property such as preparing for the shoot, finding clients, communicating with those clients to determine what product they require, post production, delivering the photos and any other media, billing clients and then ensuring that the client is satisfied with the final output. Remember, you’re working alone now and so it’s up to you to manage all of these aspects if you want to succeed in the industry.
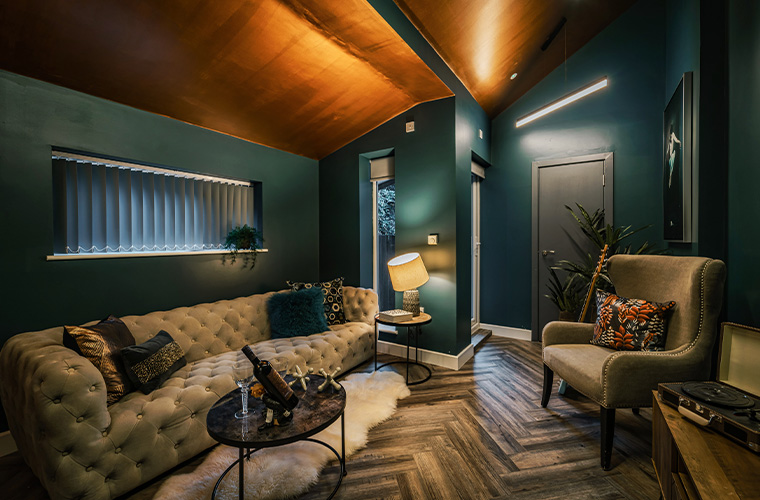
On top of taking the pictures, be prepared to have to adjust furniture, tweak curtains, turn lights on or off depending on what is required to highlight the room, move props and anything else you feel is required to get the perfect shot.
HOW TO PRICE YOUR PROPERTY PHOTOGRAPHY
Although this is a very important point to cover, I’m not going to give you an exact number because there are so many factors that can affect this such as location, types of client, level of expertise and many more. What I can tell are some of the factors that you need to consider when setting your price:
- How far away is the job? Ensure that you allow a budget to cover travel and time to get to and from your job.
- What is the purpose of the photos? Are you taking a few high end shots for a magazine? Are you simply taking a few shots of each room for the purposes of an estate agent or developer who is looking to sell the property?
- How much editing time do you need? You’ll need to allow more time if you’re producing high end photos that have more editing such as exposure blending or removal of distracting objects etc.
- How much do you actually need to live? When you’re working for yourself, you need to think about how much money you need to make to cover your costs.
- What are others in your area charging? It’s worth doing a little investigation into who else covers your area and find out what they are charging. If you’re new to Property Photography then you’ll need to adjust your prices to suit.
If you’re working for an agency, they may dictate the price; they often pay quite low amounts compared to developers or private clients but they do tend to take care of the editing for you so there’s much less work for you to do once you’ve taken the images.
CONCLUSION
By this point, you should have all of the equipment you’re going to need and hopefully you’ve talked to some potential clients but before you go out on your first shoot, PRACTISE!
Get your equipment out and shoot your own property as if it were a client’s job and edit the photos to the highest quality you are able to. This is the opportunity for you to experiment with angles to see what works and what does’t work. See what edits look good and what doesn’t work so well. This is the time to get things wrong without it having any negative consequence and you can repeat this step as many times as you need to before you feel ready to take on that first paid job.
Stay tuned for more detailed articles that will break these topics down into more detail, and if you have any specific questions about this article, leave a comment below.